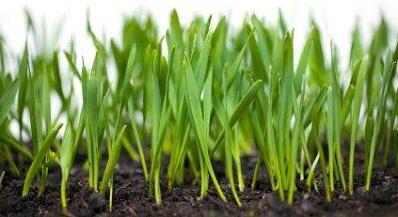
The Ecology and Sustainability Resource Center (ESOC) with the Health and Wellness Center at Southern Oregon University hosted the Sprouting Workshop on Thursday, the 25th, to provide instruction on how to grow sprouts at home. Health Promotion Specialist, Matt Vogel presented his simple methods and processes of how to germinate these tiny vegetables in the comfort of one’s own home.
Vogel began by introducing his two favorite types of sprouts – alfalfa sprouts and clover sprouts – the latter of which he prefers. He next explained that sprouts are seeds that grow and can produce more seeds in an infinite process. “It really is amazing that seed sprouts create more seeds from just that singular, original seed”, said Vogel. “It’s extremely exponential.”
All one needs to grow sprouts at home is a mason jar, a sprouting lid, an angled dish rack, and of course, sprout seeds. There are four simple steps to take in order to grow sprouts at home successfully…
Step 1: Soaking the seeds. The soaking allows the water to get in and crack the seeds and also allows the roots to dig in to the soil.
Step 2: Rinse 2-3 times per day. After rinsing, shake the jar, then place the jar at a 45-degree angle to allow airflow and drainage.
Following these first two steps doesn’t necessarily mean every seed will germinate. In fact, Vogel said that in every batch, 10% won’t germinate. This is due to the plant preserving itself. “If all the seeds germinated at the same time and a natural event were to wipe them all out, 10% would still survive because their growth was delayed,” Vogel explained. “Plants are smart!”
There is a specific growth timeline depending on the type of seed, nut, or grain. An informational timetable can be accessed at Weed ‘em & Reap. Increasing the size of the sprouting lid as they grow may also be necessary.
Step 3: Final rinse. Soak the sprouts in a large bowl and shake them around slightly for separation. Remove any hulls that may have popped out and put the jar back at a 45-degree angle until they are dry. Drying take approximately 12 hours.
Step 4: Proper Storage. The most important thing is that the sprouts are dry. Make sure to store them in a container and place in a refrigerator. Growth will still continue, but will slow due to cooler temperatures.
Sprouts are not only simple to grow. Vogel explained sprouts are also dense in nutrients. “When you eat sprouts, enzyme inhibitors are broken down causing more enzyme availability,” said Vogel. The enzymes in sprouts are good for one’s health because they control the speed of chemical reactions in the body and help with digestion. “You’ll also want to eat sprouts raw rather than cooking them because cooking them will just cause them to dissolve, which defeats the purpose.”
Though nutritious, many question if sprouts are safe to consume because of the possibility of bacteria due to the warm, humid environment sprouts are grown in. “There’s no question that home production of sprouts is safer than commercial production. Nobody should ever buy sprouts from the store,” said Vogel. “Also make sure to buy untreated seeds, nuts, and grains to avoid consuming chemical solutions.”
Vogel’s interest in farming sprouted in him (pun intended) when he was a boy. Growing up in farming towns in Illinois and Michigan, he has always had a connection with agriculture. “I’ve worked on farms, I’ve gardened, and it just seemed like a natural extension of these things to doing something during the winter – sprouting,” said Vogel. Sprouting is mainly just a winter time thing for me so I can see things growing in my kitchen and can eat something healthy as well.”
Vogel believes that it is important for students to learn practical, hands-on skills. This is evident in the programs that he hosts, which are sometimes more skill based than knowledge based. “One thing I’ve noticed over the years is that sprouting gives you insight into gardening and gardening gives you insight into sprouting. It’s an interesting, mutually beneficial thing between growing and learning.”


